Automated Marketing System
FAQ
Frequently Asked Questions
How to Set up any Email Client
Setting up an email client for the first time can seem a little complicated, but once you know a few key pieces of information, you can get almost any client up and running quickly.
The easiest way to start checking a new email account is to use a Webmail interface. This guide, however, covers setting up an email account in a local application (an email client) installed on your computer.
While each email client’s setup process is going to be slightly different, the information below applies to any email client. You’ll find specific instructions for popular clients at the bottom of this article.
Step #1: Obtain Settings for Your Email Account
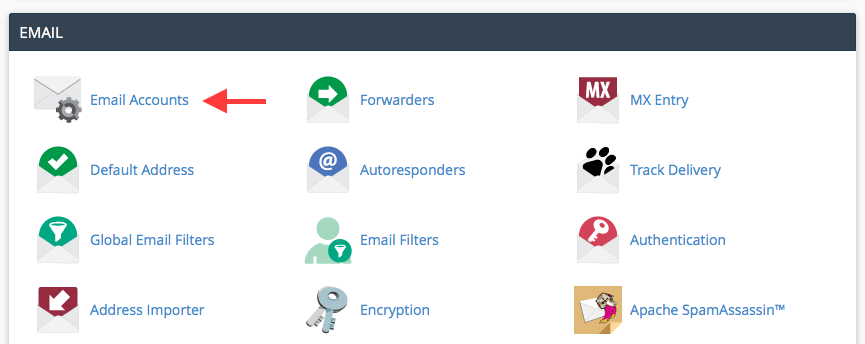
To set up your email client, you’ll first need to obtain (or confirm) the email account’s connection settings. You can do that by logging into cPanel, and selecting Email Accounts under the Email heading.
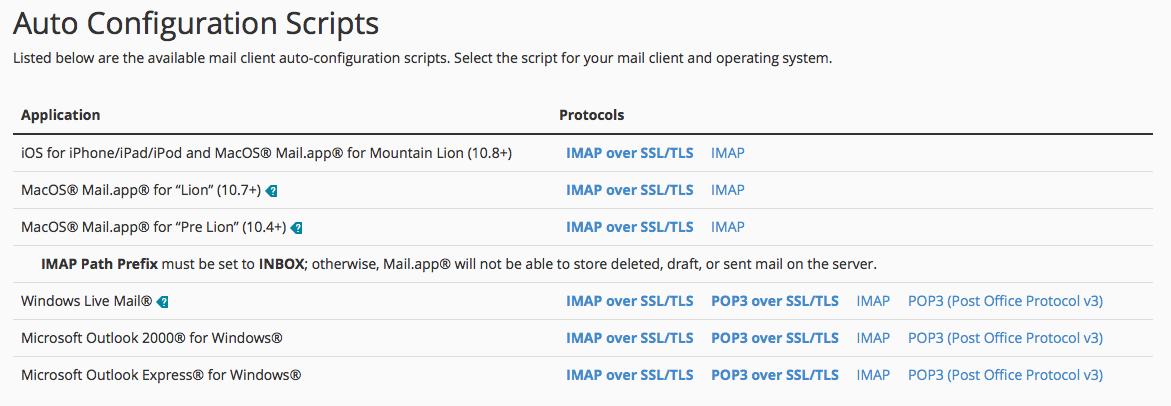
If you are using a mail client listed under the Auto Configuration Scripts section at the top of the Configure Mail Client page, you may download the script for the client and protocol you wish to use by clicking on the appropriate link. However, please note that not all email clients are supported by these cPanel scripts, and the scripts may not work with the latest versions of popular clients such as Outlook or Mac Mail.
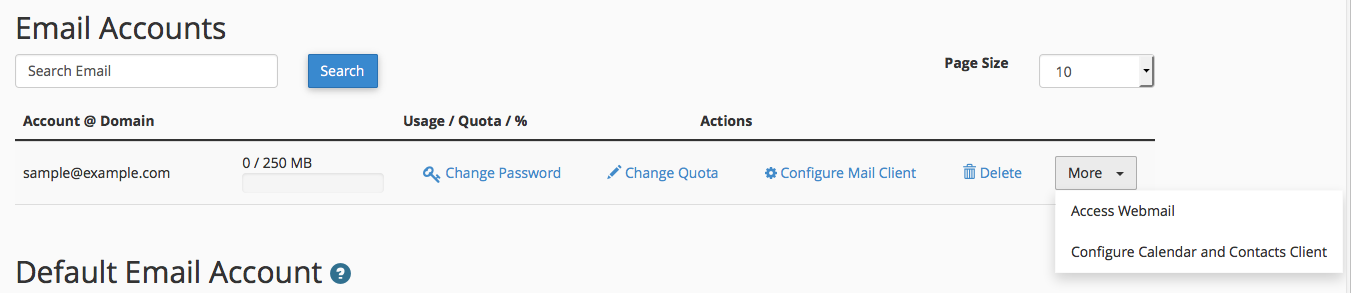
If you are unable to use the script, you can get the manual settings by clicking on the Configure Mail Client to the right of the email address in the Email Accounts section. Depending on your version of cPanel and active theme, that link may be listed under the Actions column or in the More dropdown menu to the far right of the address.
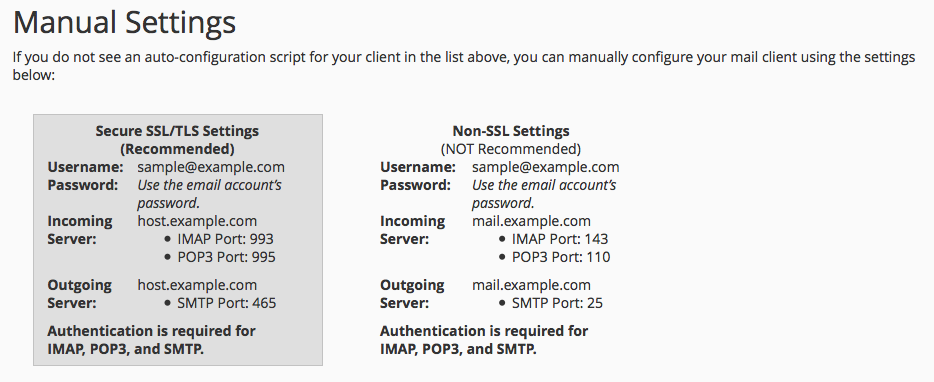
If you are unable to access cPanel to obtain the settings specific for your email account, typical settings are as follows:
Step #2: Enter Account Information in Your Email Client
All popular (and more importantly up to date) email clients require only a few basic pieces of information to start checking and sending messages from your account.
-
Incoming Server
The server that receives and stores messages sent to your e-mail account, accessed by the e-mail client via IMAP or POP3. For an overview of the differences between the two please see our IMAP vs POP3 E-Mail guide. Secure (SSL) connections use the server’s hostname and standard (non-SSL) connections use your domain name.
- Outgoing Server (SMTP)
- User Name and Password
If you are launching your local email client for the first time after you installed it you will most likely be prompted to create a new account as soon as you launch the program. The following steps will start the process of adding a new email account to your local client. Once you have completed these steps, you will see a screen that asks for the server and user information outlined above.
-
Outlook
- In the top menu, click on Tools and then Email Accounts (some versions of Outlook may say just Accounts).
- In some versions of Outlook you may need to click on the Email tab.
- Click on Add a new e-mail account… or simply New and then click Next.
- For more detail, see How To Set up Email in Outlook 2016, How To Set up Email in Outlook 2013, or How To Set up Email in Outlook 2010.
- Mac OS X Mail
- Thunderbird
- Outlook Express/Windows Mail
- iPhone Email
- Android Email
- Blackberry Internet Service 1.8
- Blackberry Internet Service 2